Friday, August 24, 2012

Oven Baked Plantain Chips


Ready for something crunchy this weekend? How about Oven Baked plantain chips!! Easiest to make won't take much time. Great healthy alternative snack for all those chips lovers out there! You control the spices and the oil content and enjoy completely as per your taste.

Here is how I  made my batch.

Ingredients-:

3 plantains
Coconut oil
Salt
Black pepper- freshly ground for an extra kick


And here is how to make them-:

  • With the help of vegetable peeler peel the plantains from all sides.
  • Slice them thinly with the help of slicer/ mandolin.( Before slicing dip the tip of plantain into coconut oil, remove and start slicing them, it helps prevent sticking while slicing.
  • In a bowl, mix coconut oil, salt and freshly ground black pepper and the plantain slices. You can also add some chilly powder if you like, or may be paprika or anything else that you feel like adding .Coat well and keep aside. 
  • Line the baking pan with aluminium foil and spray with some oil. 
  • Start spreading the plantain slices in single layer on the baking pan.
  • Slide the baking pan into a preheated 350F oven  for about 30-35 minutes.
  • If you have a couple of baking sheets make sure to rotate them and also flip the banana slices halfway through.
  • Bake them until golden and crunchy... and don't forget to savor every bite..:)

Monday, August 20, 2012

Banana Oat Cranberry Bars


This was my second attempt at making these cereal bars! And I promised myself that I will never buy them from the store ever again. The fun with any kind of homemade food is that you can completely alter it to your taste and this is exactly the reason that I keep attempting , sometimes getting better, sometimes not so much! I totally enjoy the whole process and the results is not what I look forward to anymore.

First time I made them for our Bay Area trip and this time was for the Vancouver weekend get-away!
They are easy to carry as a snack anytime you travel. They have a good shelf life. I think they should last for 2-3 days even in the bright sun. My kid loved it, and munched on it at least twice both the days of our trip..:)

Here is what you will need-:

  • 1/4th cup Almond milk or soy milk
  • 1/2 cup brown sugar
  • 1tbsp flax seed
  • 1/4th cup coconut oil
  • 1tsp vanilla extract
  • 2 medium ripe bananas
  • 1/3 cup of cranberries/ pumpkin seeds etc.
  • 2 tbsp of Chia seeds soaked overnight into 2 tbsp of almond milk/ soy milk
  • 1.5 cups of regular oats
  • 1/2 cup unsweetened coconut
  • 1/2 tsp cinnamon powder
  • 1/4th cup whole wheat flour
  • 1/2tsp baking powder
  • 1/8 tsp salt
Method-:
  • Preheat the oven to 350F.
  • Combine sugar, flax seed, almond milk , coconut oil, vanilla extract and whisk together.Keep aside.
  • Mash bananas with a fork and stir into wet mixture. Also add cranberries, pumpkin seeds, soaked Chia seeds.
  • In other bowl, mix all the dry ingredients.(Oats, wheat flour, shredded coconut, flax seed, cinnamon powder, baking powder and salt)
My little helper- mixing the cranberries and eating half of them while mixing..:)
  • Add the wet mixture to dry mixture and mix.
  • Line a baking sheet with a parchment paper and spray lightly with a canola oil spray.
  • Scoop out on to the pan and press firmly making it even.
Serious work is in progress, no jokes please...!
Before jumping into oven!
  • Bake at 350F for 35- 40 minutes.
After popping out of the oven!
  • Let it cool and slice into bars. It will make about 10 bars depending on how thick you spread the mixture. The first time I made them, they came out to be 10. This time I think I spread them a little thinner and they came out 12 with more crunch to them because of the thinness.

Sunday, August 12, 2012

Roasted Brussels Sprouts


Oh...that smoky flavor of these tiny little green Brussels Sprouts is just worth eating rather than describing!
It's a great recipe to enjoy on the BBQ day.

Here is what you will need-:

Brussels Sprouts
Olive oil- about 2 tsp just enough to coat the sprouts in.
Paprika
Salt
Black pepper- freshly ground.

You can certainly alter the spices as per your choice.

Method-:

  • Heat the oven to 375F
  • Cut the Brussels sprouts in half.
  • In a bowl mix olive oil and rest of the seasoning/ spices.
  • Add the Brussels sprouts into the bowl and mix well so that every piece will get coated very well.
  • Line the baking sheet with aluminium foil and spread the Brussels sprout on to the baking sheet. Arrange so that they form a single layer and do not overlap.
  • Roast for about 10-12 minutes. Check if they are done and have burnt just enough to give you that smoky taste.
  • Turn them if needed and bake for another 5 minutes or so. Keep checking.
Enjoy!!!

Thursday, July 19, 2012

Homemade Granola


Nothing like crunchy granola in your cereal or as a yogurt topping or just as a snack on the go.Super easy and super fun to make your own granola! Once in a while I do buy from the store but most of the times I prefer to make my own. You can totally customize it to your taste. Considering my son's allergies, I find it easy to make my own instead of reading labels on the back of the granola pack. That way I have the whole control over what's going in and I also get to modify it the next time if I don't like what I added this time. Super flexible isn't it?

Here is what you will need-:

  •  3 cups of rolled oats
  • 3/4th cup agave
  • 4 tbsp water
  • 1.5 tsp vanilla extract/ almond extract
  • 1/4 cup sesame seeds
  • 1 cup of mixed dry fruit- I used dried blueberries and golden raisins
  • 1/4 cup of sliced almonds
Feel free to add anything else you like. Chopped walnuts or pecans is a great substitute for almonds. You can add dried papaya or any other dry fruit you may like.

Method-:
  • Preheat oven to 350 F. Spread the oats on a parchment paper lined baking sheet and bake for about 15 minutes. Remember to stir twice in between.
  • Mix agave, water, vanilla extract or whichever extract you are using in a bowl. Add toasted oats, sesame seeds, and dry fruits and almonds.
  • Mix well and spread over the baking sheet and bake for 15 more minutes, stirring twice in between.
  • Let it cool and munch on some while still kind of hot...:)

Just few more captures that I enjoyed clicking..:)

Let them spill a bit!!


Wednesday, July 11, 2012

Homemade Almond Milk


As I am preparing my homemade granola post(which is going to be the next), I thought I should write about this wonderful health drink, perfect for summer!

Making your own almond milk is very much exciting. I didn't know how easy it is to make your own almond milk at home and so I used to buy one from the grocer just like most of us do! Honestly this is the simplest recipe ever and the taste..oh..nowhere close to what you get from the grocer. Simply delicious..no not the brand, that was my reaction after having first couple of sips..:)

All you have to do to make this delicious milk is to soak almonds overnight in some water. About 10-12 organic almonds and about 1 cup of water. To make it thick add less water and to make it watery add more.

Next morning put the almond into the blender after straining all the water from it. Add fresh water to it. If your blender is like mine, which grinds things better if they have less water content, don't add all the water right away. Just add all the soaked almonds and then add half of the water. Let the mixture get blended well and then add remaining water and blend nicely.

Use the cheesecloth to strain the mixture and you will get a nice snow white creamy almond milk! All the residue can be thrown or you can put it to good use as a facial scrub or even whole body scrub.

Recipe for the Homemade Almond Scrub-:
  • Almond residue
  • Jojoba oil
  • Lemon zest or orange zest
Mix all the 3 ingredients and apply on the face. Leave it for 10-15 minutes and wash. Or you can simply apply the scrub in shower and get the benefits of almond and the orange zest. Sorry I don't have the pic for the scrub. I will upload the pic when I will make the scrub again. The scrub should be good in the refrigerator for 2-3 days in a glass container.

Enjoy sunny afternoon with a glass of homemade almond milk with couple of cubes of ice and without all the horrible additives that are in the store bought milk!!


Sunday, July 1, 2012

Dind- Steamed Wheat Wrap with Split Chana Dal Stuffing


A classic Maharashtrian ( A state of India where I grew up) recipe which is made on the occasion of Nag Panchami. For me, I don't wait for any occasion to celebrate great food! I usually make these for breakfast on any relax weekends. The recipe is not too hard but it takes some time to prepare the filling that goes inside the wheat dough.

Ingredients-:
  1. 1/2 cup whole wheat flour
  2. 1/2  cup jaggery, crushed or shredded
  3. 1/2  cup split chana dal
  4. 1 tbsp oil
  5. pinch of salt
  6. 1/4th tsp Cardamom powder
  7. Earth Balance butter 
  8. A few strand of saffron to garnish.
Procedure-:

For the Stuffing-:
  1. Pressure cook the chana dal with 1:3 ratio. For 1/2 cup of chana dal add 1 and half cups of water. After the dal gets cooked strain it through the strainer and remove all the water from it.
  2. In a pan mix in the dal and the jaggery and start cooking the mixture on a medium heat.
  3. Keep stirring continuously as it can stick to the bottom easily. Mix it until the mixture becomes thick. Add cardamom powder. Mix and turn off the stove.
For the Dough-:
  1. Add salt to the wheat flour. Heat the oil  and add very hot oil into the dough. You should see the flour getting frothy after you add the hot oil. Add water and make a little harder dough than you usually make for roti.
Putting things together-:
  1. Divide the dough into nice round balls.
  2. Roll into thin round shape.
  3. Put about 1 tbsp of filling onto the rolled out dough.

    4.  Fold 2 sides of on to top of the filling.

    5.  Fold remaining 2 sides over the previous fold. Please see the picture below.


6.  I used electric steamer to steam the Dind, but you don't need to have steamer. You can simple put a big pan with some water in it. When the water comes to boil put a colander or any stainless steel pot  and line it with a thin cloth. Place the dind into the pan and cover and steam for about 15 minutes .

7.  Make sure that you don't put them on top of each other. Traditionally the ghee is used to top it off. It melts over the hot dind. But I tried pouring some earth balance butter since I was trying to find the vegan substitute and it tasted nice. Finally top it off with couple of strands of saffron to add some color...:)

Variation for the filling-:
  1. You can add some chopped nuts into the filling . I like to add sliced almonds. They give a nice bite to the filling.
  2. You can also try and add some shredded coconut. Lightly dry toast the coconut and then add it to the filling.

Have a great week ahead!


Thursday, June 7, 2012

Varanfal/ varanphal (Chakolya)


If you are like me who likes hot one pot meals you will love today's post. This is a great nutritious one pot meal, providing carbs, proteins, fat all in one bowl. Oh Yes, you need good fat to loose fat!

This is a typical maharashtrian dish(Maharashtra- the state where I grew up). Growing up, my mom never made this dish, because no one at my home used to like it. I remember I tasted it at one of my friends home, but didn't like it then. After I got married, my mother in law made this and I fell in love with Varanfal(also known as Chakolya).

As this dish needs a little bit more time than just pressure cooking a simple daal and rice, weeknight is not very ideal for me to cook varanfal. I usually reserve it for the weekend lunch, when all of us enjoy this delicious hot bowl.

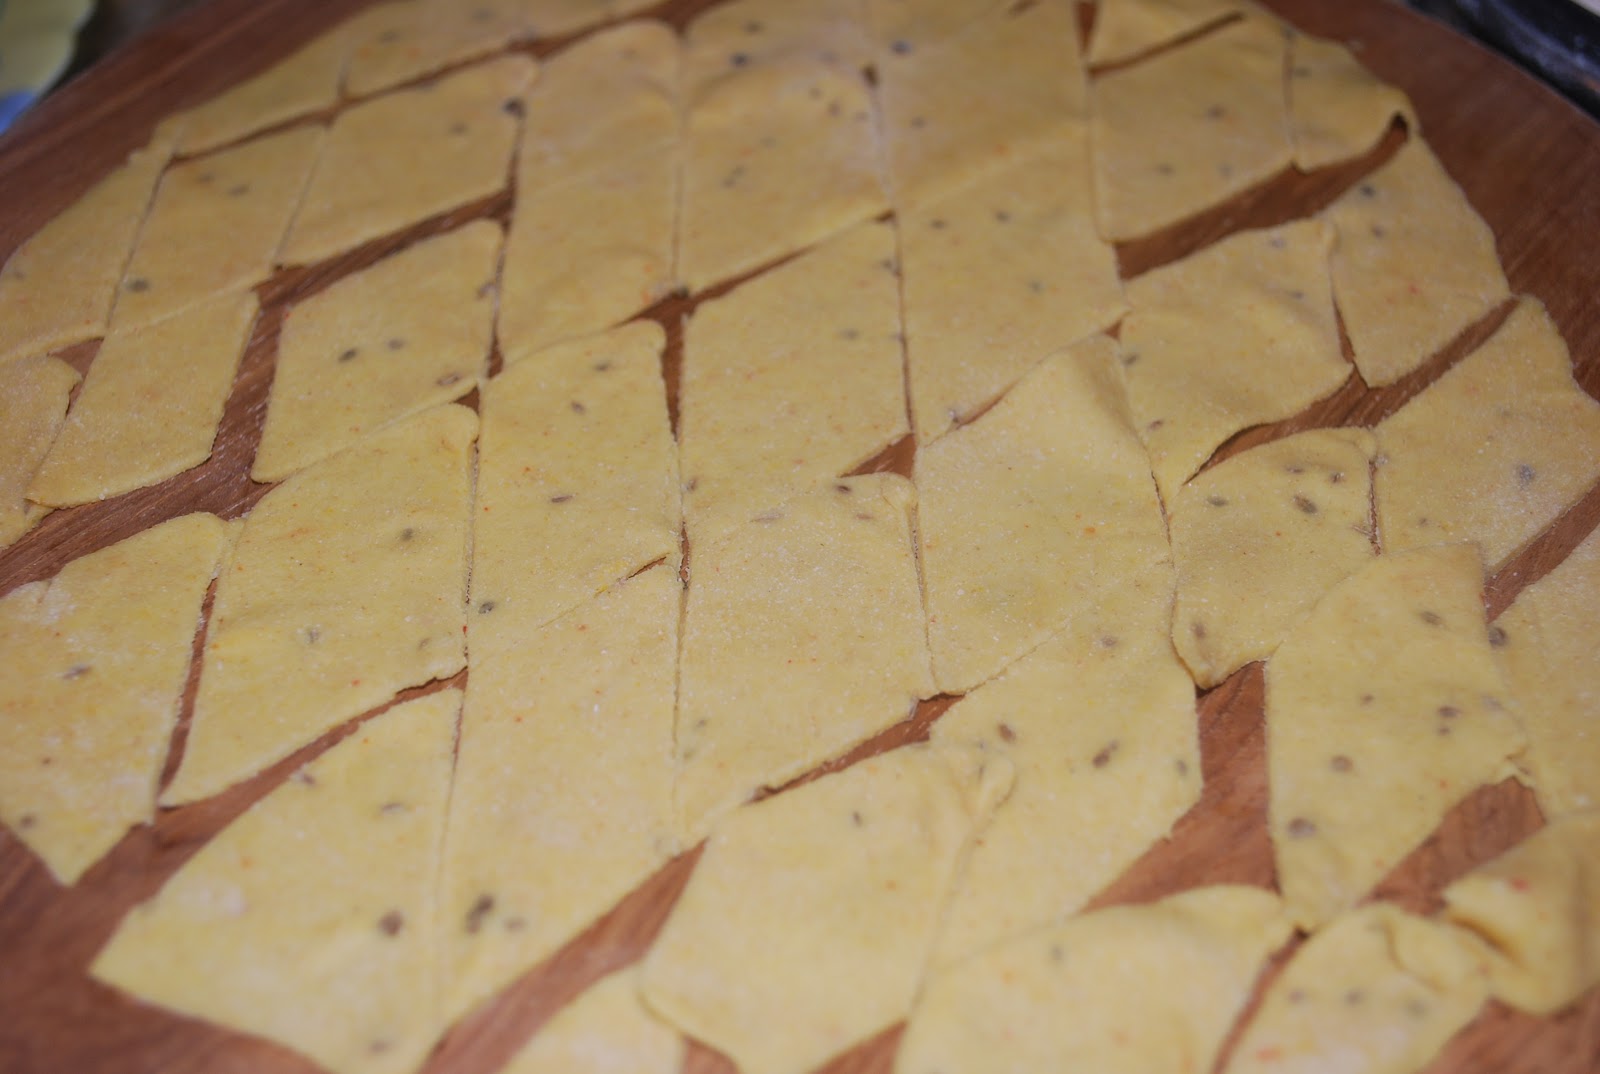
Varanfal is nothing but a rolled out roti of whole wheat flour with some spices, cut into squares or diamonds and then dumped into hot dal. Dal is made up of some more different kind of spices and tomatoes. Basically you can visualize it as wheat dumplings in a daal soup. The key is not to roast the roti, just roll it and toss into the daal.

So let's get to the ingredients and then to it's method!

Ingredients-:

For the Dough-:


  • Whole wheat flour
  • turmeric powder
  • Red chilly powder
  • Ajwain seeds
  • Salt
For the Daal-:
  • Cumin seeds
  • Mustard Seeds
  • Methi seeds
  • Curry leaves
  • Green chillies
  • Turmeric powder
  • Chopped garlic
  • tamarind pulp
  • Jaggery
  • Salt to taste
  • Oil- peanut/ safflower
  • Ghee

Method
  • Pressure cook the toor daal and keep it ready
  • Add spices for the dough in the whole wheat flour, add water and salt, kneed and keep aside.
  • Put some oil or ghee in a big kadai/ pan.
  • When oil gets hot add, cumin and mustard seeds and methi seeds
  • As they splutter, add asafoetida, curry leaves and chopped garlic.
  • Saute for about a minute or so, until the garlic gets nice golden color.
  • Add green chillies and pour in the cooked daal that is kept aside.
  • Add water and mix well.
  • Add chopped tomatoes, red chilly powder, goda masala(kala masala) coriander powder and salt to taste
  • Add tamarind paste and jaggery and mix well. Let the daal simmer on low heat.
  • Roll the dough by dividing into small sized balls( about the size of a golf ball)
  • Roll the ball very thin and then cut into diamond or square shape.

  • Drop the squares into the cooking daal.
  • After you add the squares/ dumplings adjust the water as desired. The mixture gets thicker as you continue to cook. Add more water, if you feel that it's getting lumpy.
  • Mix well, cover and let it simmer for about 10 minutes. Let the dumplings get cooked well.
  • Pour into your bowl and garnish with some chopped cilantro and a dollop of ghee on top.
Enjoy the delicious meal!!

Thursday, April 26, 2012

Overnight Oats


Got addicted to this delicious breakfast, that you almost don't need any preparation for. It's very healthy, and very satiating. Just recently came across this recipe on Angela's blog(one of my favorite blogger)- Oh She Glows. I substituted some ingredients as per my taste.
All you have to do is mix some ingredients a night before keep the bowl in the refrigerator and mix the remaining the next morning and that's it.!!
Ingredients-
For a night before-:
  • Quick cooking oats/ rolled oats( I have tried both, works well)
  • Soy milk(I used vanilla)
  • Chia seeds(My most favorite ingredient of this recipe)
  • Mashed banana
Mashed banana, oats and chia seeds!


Ready to go in the refrigerator.

The morning ingredients-:
  • Almond butter/ peanut butter (I love both)
  • A dash of organic maple syrup
  • Dried Cranberries
Right out of the fridge!

The peanut butter, dried cranberries and maple syrup.
Method-:
  • Very Simple
  • Just add the night before ingredients in to a bowl and keep covered in the refrigerator overnight.
  • In the morning pull the bowl out and add the morning ingredients, mix and grab a spoon.

It tastes out of this world. The sweetness of banana just kicks off my day with full of energy. The Chia seeds puff up overnight and gel well with the rest of the ingredients giving the dish a thicker consistency.
The weather is warming up here in Seattle. What better breakfast can I find to cool me down than these  overnight oats with Chia seeds.
Benefits-:
I have been eating this for my breakfast at least 3 days a week, just because it's so easy to put together and the results are astonishing. My skin feels so soft to touch like never before. My suspect is the chia seeds. According to Ayurveda, chia supports deep hydration. More benefits of chia seeds here.

Friday, April 20, 2012

Lavash Chips


Nothing like these super simple crispy baked Lavash Chips! 
If you are like me, who likes something crunchy every once in a while, then keep reading.

The whole grain Lavash wraps!

You can find these whole grain Lavash wraps at Whole Foods ( See the picture). Whenever the wraps are down to 2/3 count, I put them to a crunchy use.
These wraps come in a rectangular shape. Just cut them into squares or you can also cut them in wedges if you like and coat with EVOO, toss with the spices of your choice, sprinkle some salt for taste. Coat well. Arrange them on a baking tray. Bake until they get crispy and light golden color. I baked them for 375F for about 10 minutes. As simple as it can get.

Make sure you keep watching them, as they turn brown very quickly.

For this version I used only salt as a seasoning, but you can certainly use, cumin powder, Garam Masala, red chilly powder or any herbs of your choice.

Have a good crunch!!


Wednesday, April 11, 2012

Banana Peanut Butter Smoothie


Greet the day with this Smiley Banana Peanut Butter Smoothie!
I love this amazing breakfast smoothie with sweetness of banana, nice heaping tablespoon of peanut butter, goodness of soy milk and few drops of maple syrup for fun..:)
Oh.. and don't forget to add a few ice cubes to the blender for making your morning a little chillier..:)


Method-:
  • Cut banana in half and along with soy milk, peanut butter, ice cubes and maple syrup, toss it in a blender.
  • Blend well and pour into a glass.
  • Enjoy!


The Banana Peanut Butter Smoothie is headed to Chilled Delights event by Tickling Palates.


Chilled Delights